Atlassian identity provider
PolicyArc uses Atlassian as a pass-through identity provider: when a user signs in, PolicyArc redirects them through Atlassian's OAuth 2.0 (3LO) flow and accepts the resulting identity. PolicyArc never sees or stores their Atlassian password.
You'll create an OAuth 2.0 integration in the Atlassian Developer console, scope it for Jira and/or Confluence, then hand the resulting client ID and secret to PolicyArc.
- An Atlassian account that can create developer apps for your org.
- Access to the Atlassian Developer console.
- The PolicyArc admin portal open in another tab.
Step 1 — Pick Atlassian in the Add Identity Provider screen
In the Admin Portal, go to Identity → Add identity provider and pick Atlassian from the provider list.
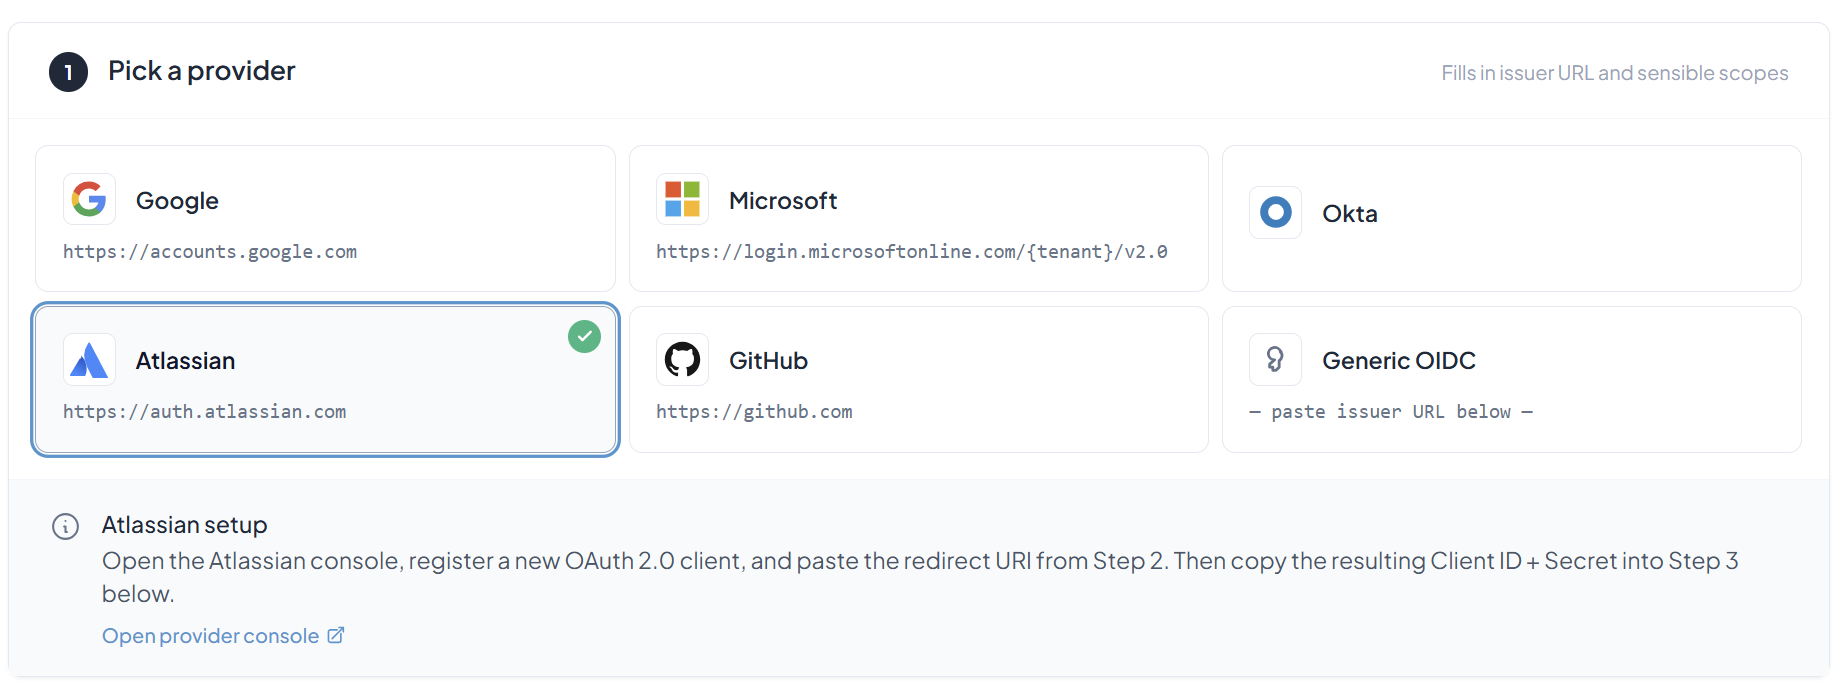
Keep this tab open — you'll come back to it after you create the integration in Atlassian.
Step 2 — Open the Atlassian provider console
Click Open provider console. Atlassian will ask you to sign in (or pick an account if you're already logged in).
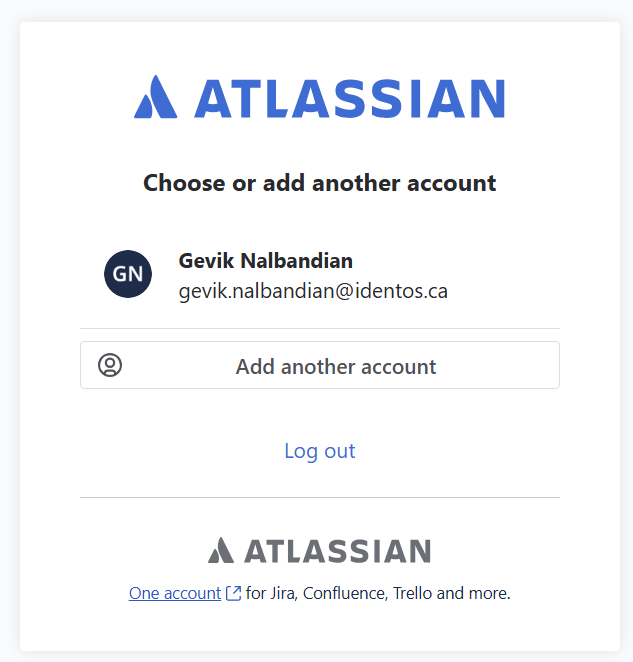
After you authenticate, you'll land on the Atlassian Developer console.
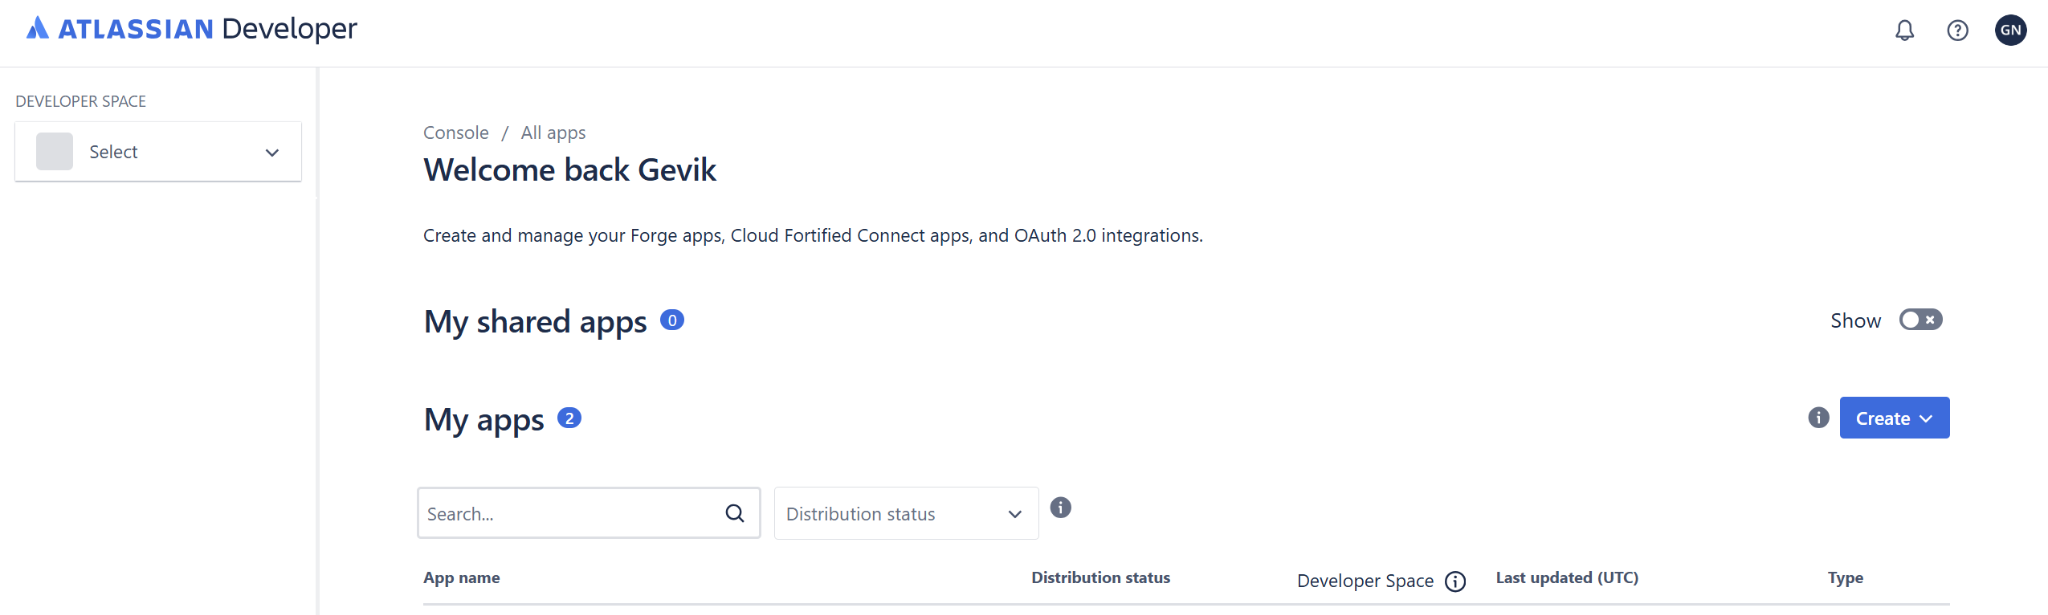
Step 3 — Create an OAuth 2.0 integration
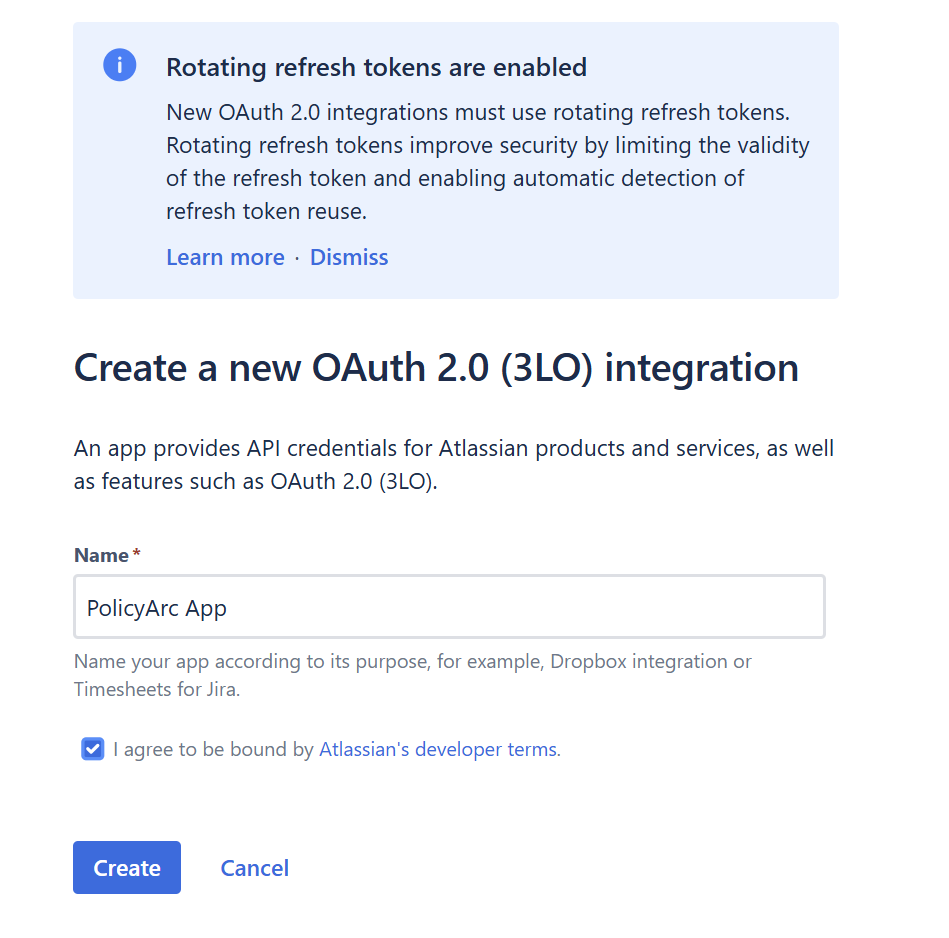
Click Create, then pick OAuth 2.0 integration.
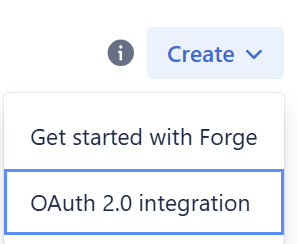
Give the app a name (for example, PolicyArc App), tick I agree to be bound by Atlassian's developer terms, and click Create.
Step 4 — Add the Jira API permission
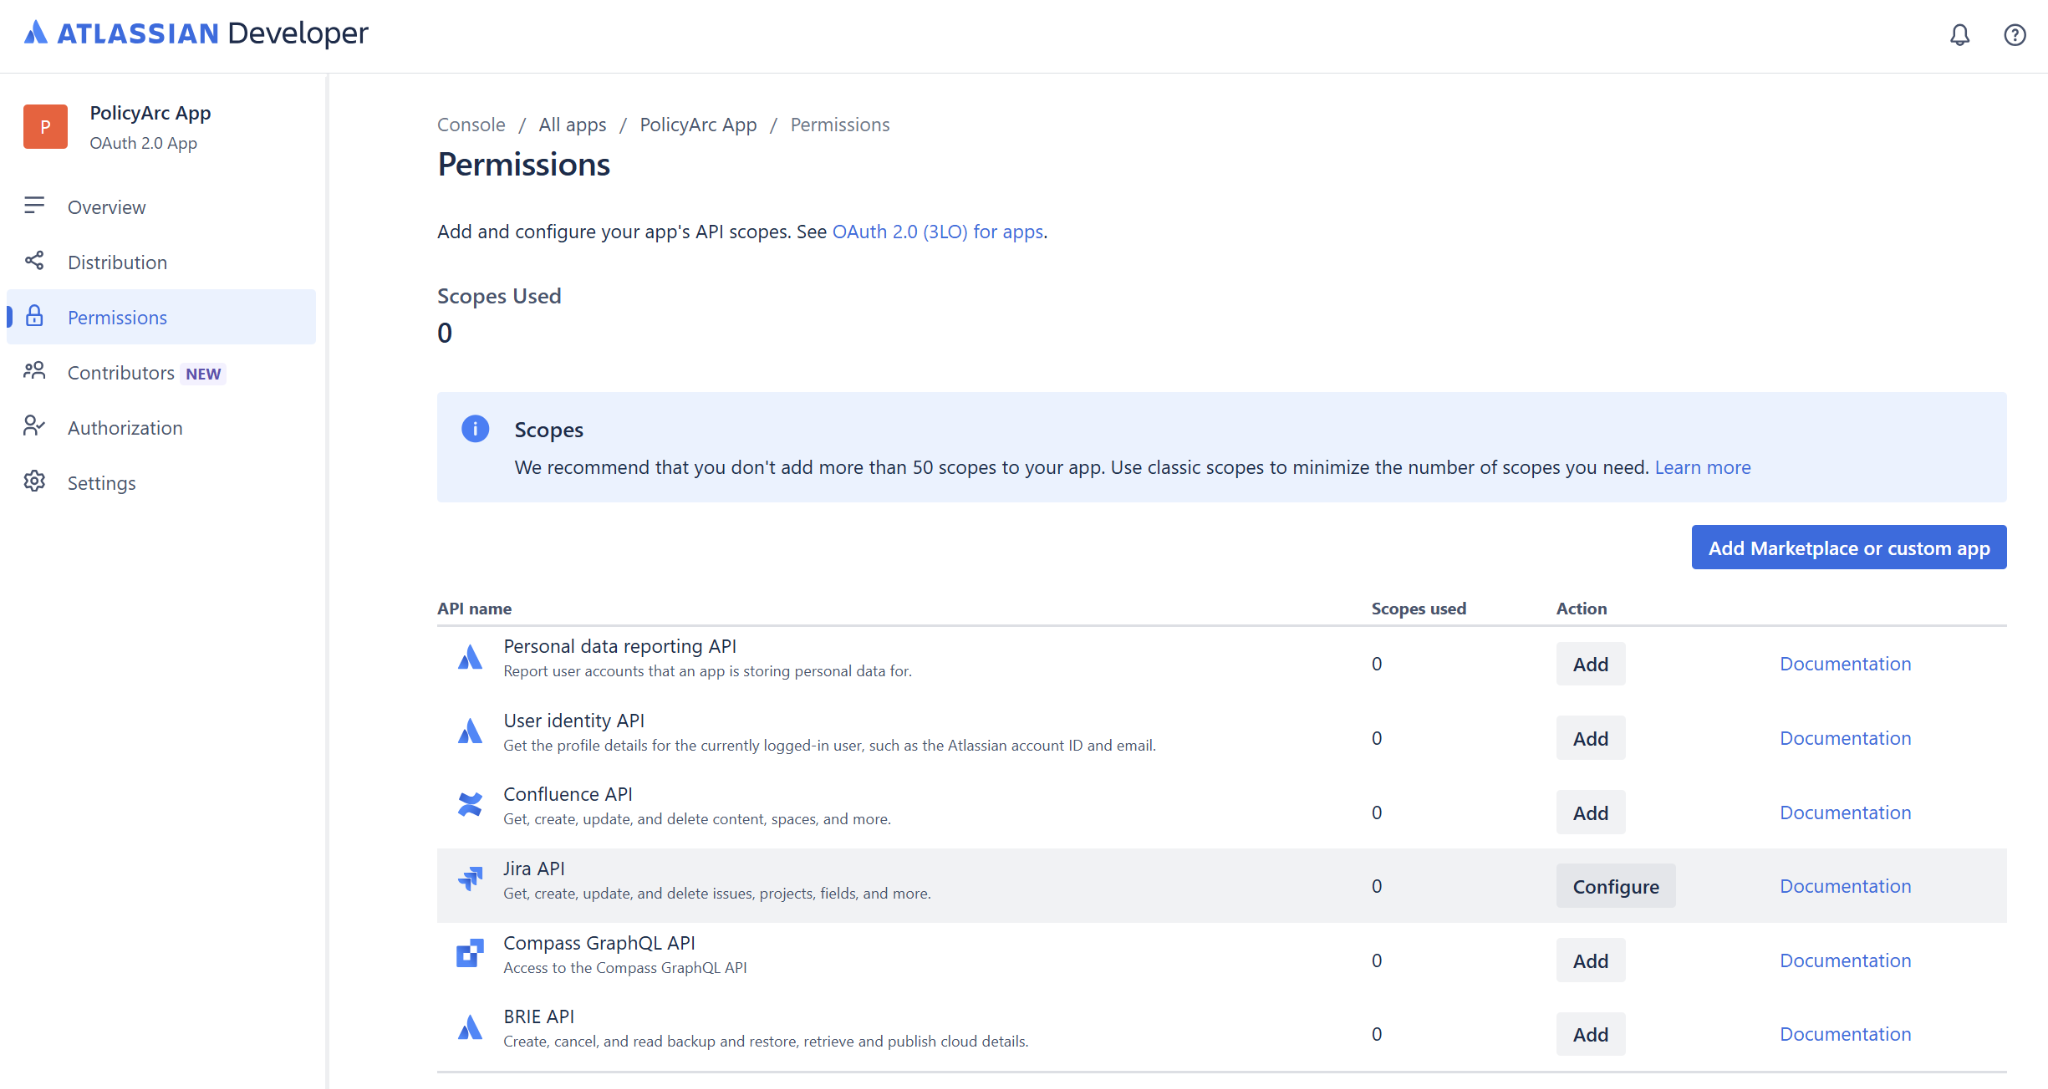
In the left-hand menu, click Permissions. You'll see a list of Atlassian APIs. Find Jira API and click Add (or Configure if you've done this before).
Step 5 — Edit the Jira API scopes (classic)
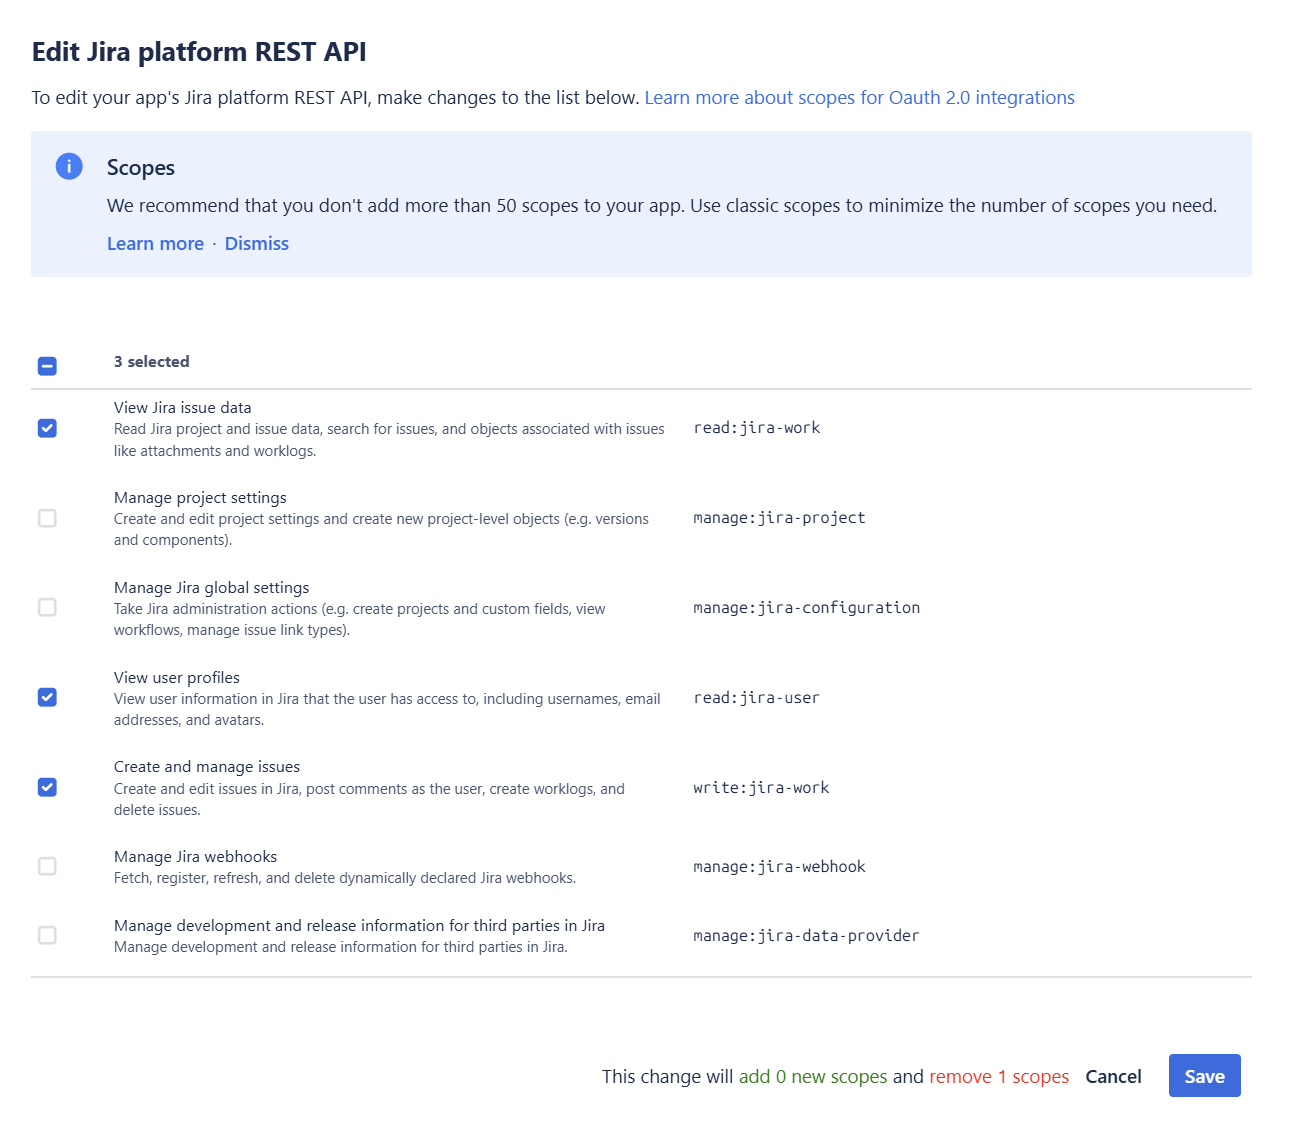
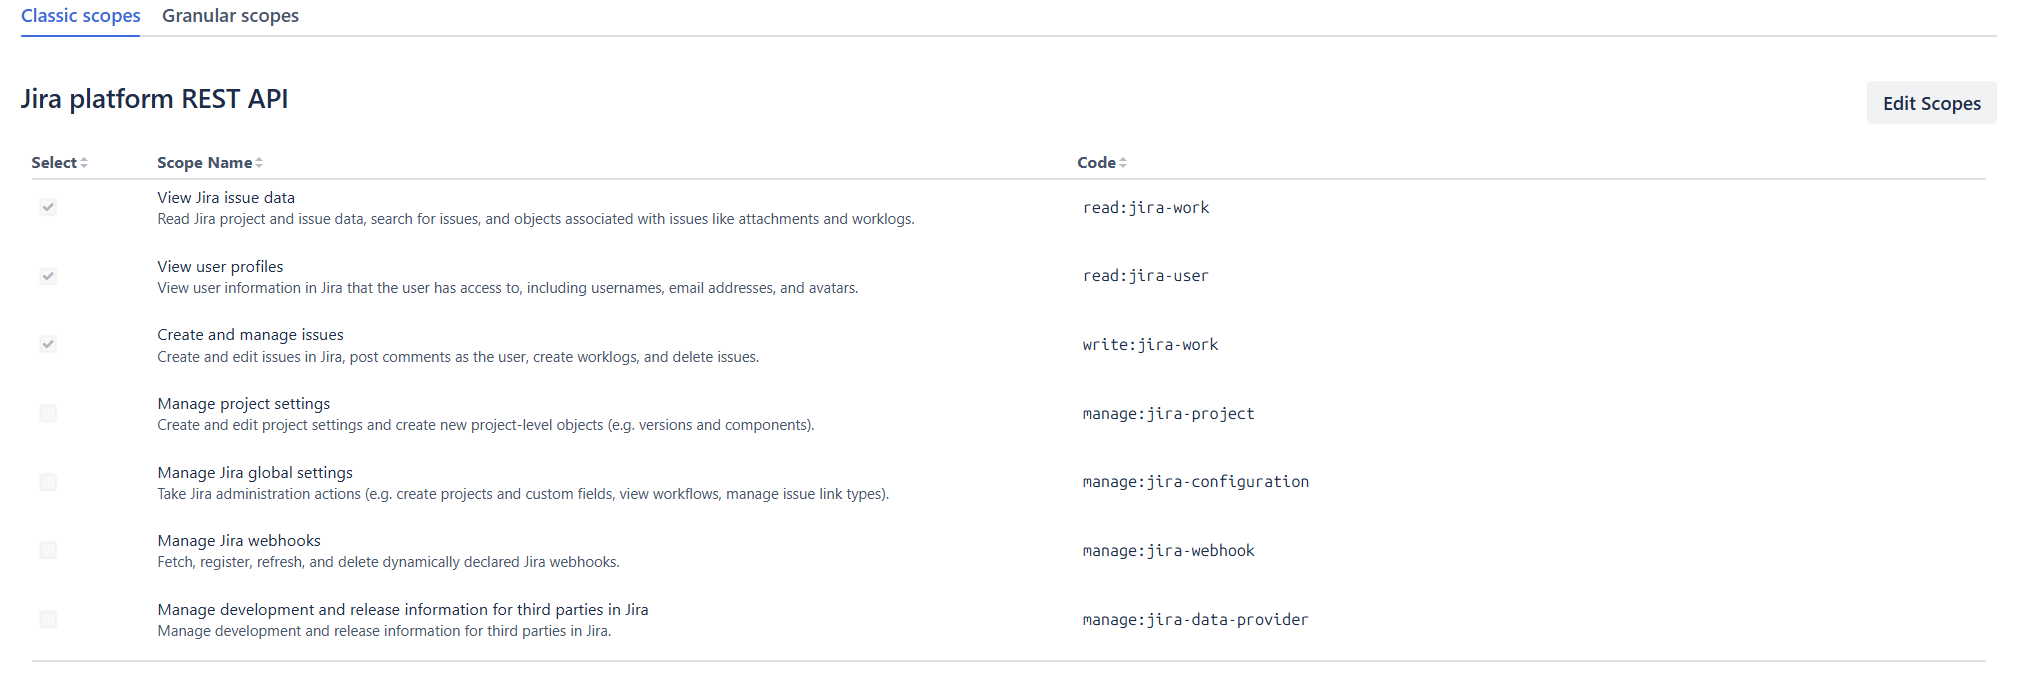
Click Configure → Edit Scopes on the Jira platform REST API row. Stay on the Classic scopes tab and select:
read:jira-work— read issues, projects, search results, attachments, worklogs.read:jira-user— read user profiles (used to build the caller's identity claim).write:jira-work— create, edit, comment on issues; create worklogs; delete issues.
Click Save.
Step 6 — Add the User Identity scope
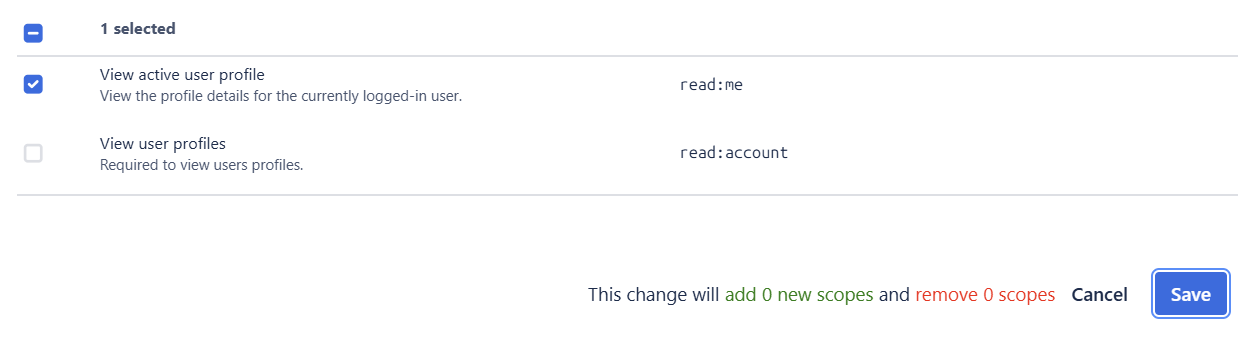
Back on the Permissions page, find User identity API and click Add → Edit Scopes. Select:
read:me— fetch the signed-in user's profile (Atlassian account ID, email).
Click Save.
When both are done your scope summary should look like this:
Atlassian has two scope styles, and which you use depends on the connector:
- The Jira connector uses classic Jira scopes (configured above).
- The Confluence connector uses granular scopes — its v2 REST API rejects the classic
read:confluence-content.*scopes. Add these in the optional step below.
After saving, Atlassian's Authorization URL generator may show a yellow warning about granular scopes (and one about Jira Service Management scopes). If you're only using Jira, both are safe to ignore. If you're adding Confluence, the granular-scopes warning is expected — you're adding those scopes intentionally. Mixing classic (Jira) and granular (Confluence) scopes on one app works; PolicyArc requests the union at sign-in and the consent screen accepts it.
You do not need to add offline_access here. PolicyArc requests it at sign-in time so the user's session can survive beyond one hour — the Atlassian consent screen will say "access your data while offline", which is expected.
Step 7 — (Optional) Add the Confluence API scopes
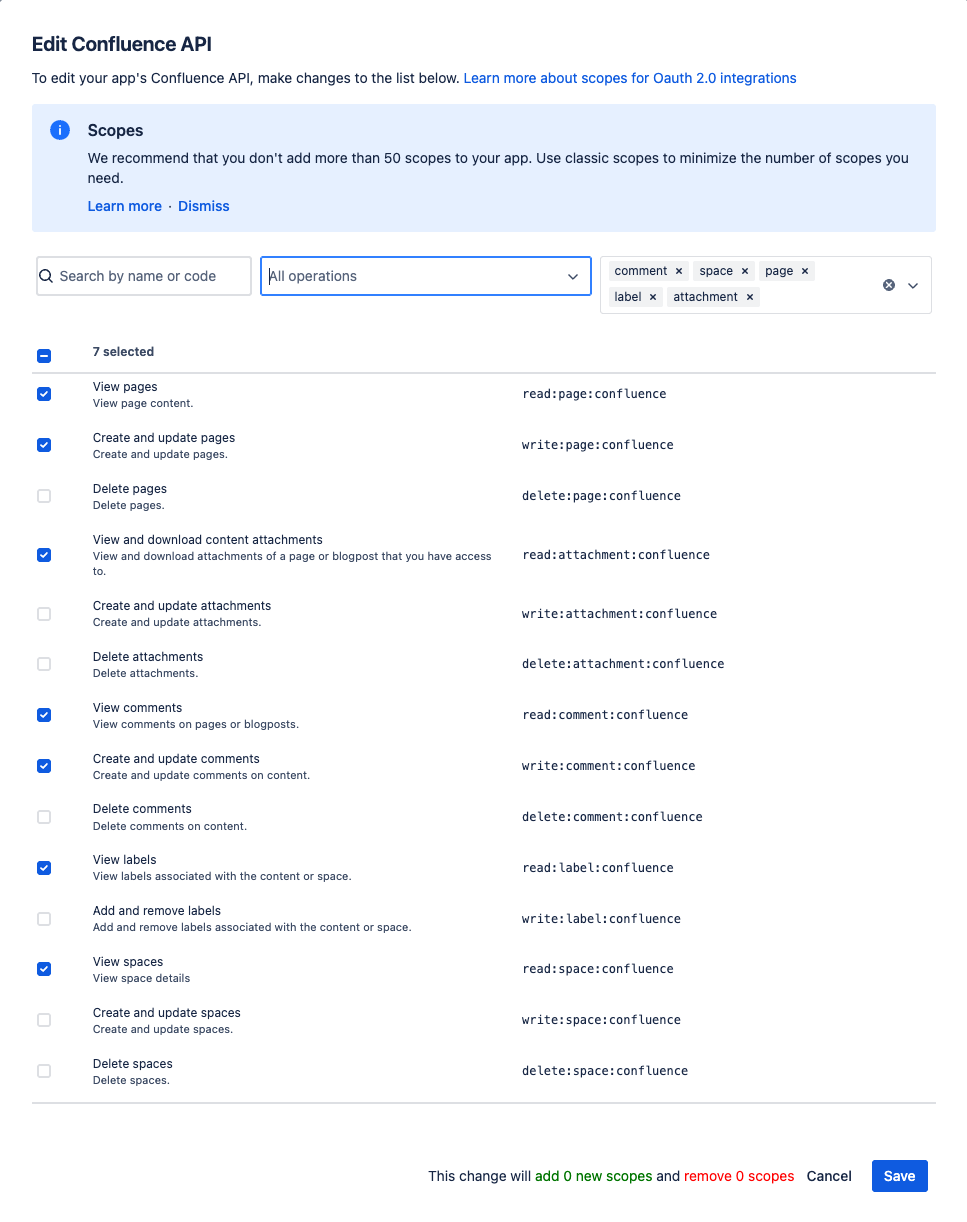
Only needed if you'll use the Confluence connector. Confluence's v2 REST API requires granular scopes — the classic read:confluence-content.* scopes are rejected by v2 with 401 "scope does not match".
Back on the Permissions page, find Confluence API and click Add → Configure → Edit Scopes, switch to the Granular scopes tab, and select:
read:space:confluence,read:page:confluence— read spaces and pages.write:page:confluence— create and update pages.read:comment:confluence,write:comment:confluence— read and post page comments.read:attachment:confluence— list page attachments.read:label:confluence— list page labels.search:confluence— CQL search.
Click Save. (read:me from Step 6 and offline_access requested at sign-in already cover identity and refresh for both Jira and Confluence.)
Step 8 — Configure the callback URL
In the left-hand menu, select Authorization and click Add next to OAuth 2.0 (3LO).
Paste the Callback URL from the PolicyArc tab you left open in Step 1 — it's the value PolicyArc shows on the Add Identity Provider screen.

Click Save changes.
Step 9 — Capture the Client ID and Client Secret
In the left-hand menu, select Settings. Scroll to the Authentication details section.
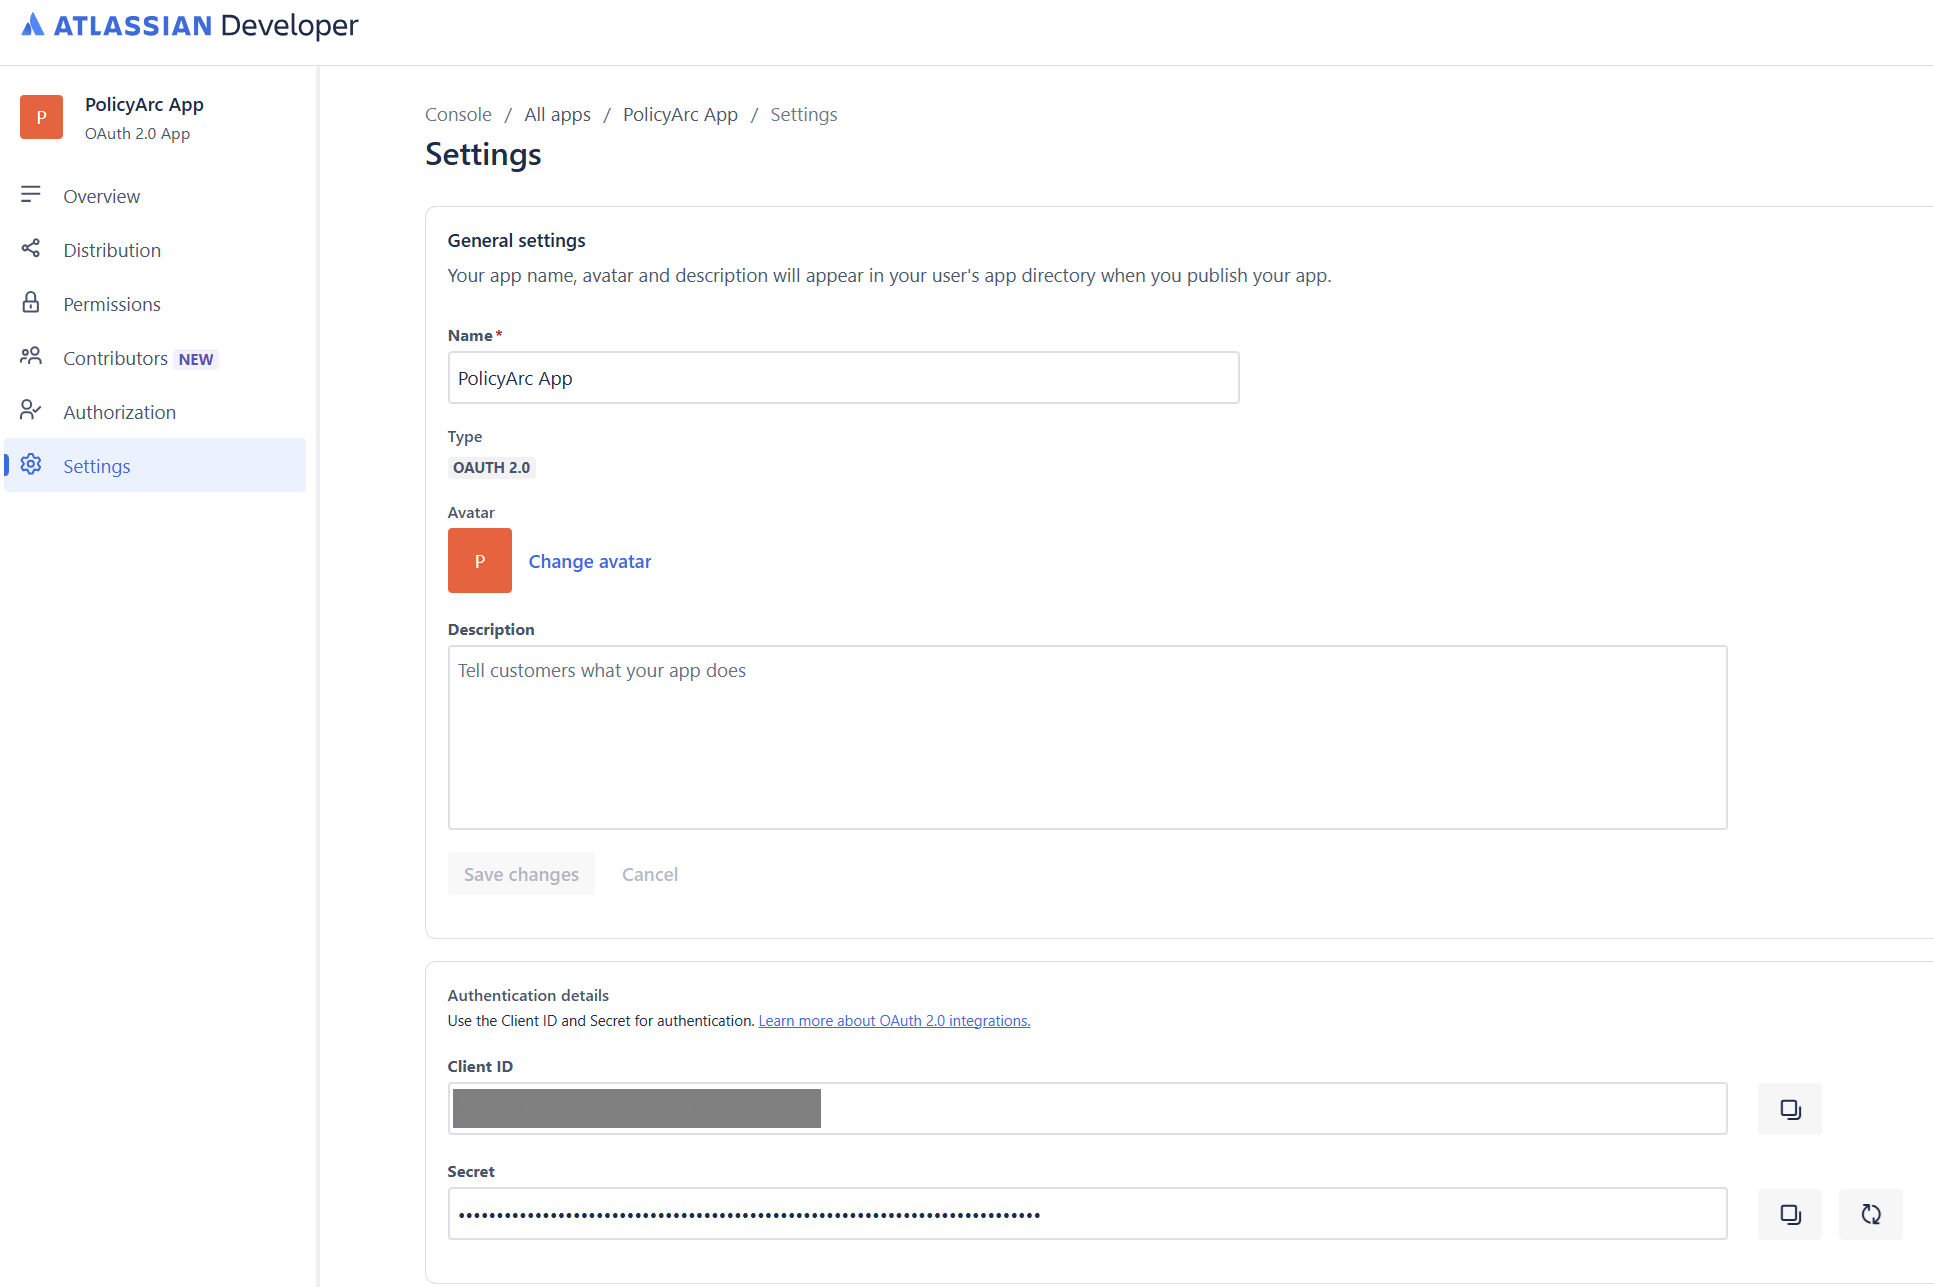
Copy both values — you'll paste them into PolicyArc next.
Step 10 — Finish the IDP in PolicyArc
Switch back to the PolicyArc Admin Portal tab. Paste the Client ID and Client secret into the form.
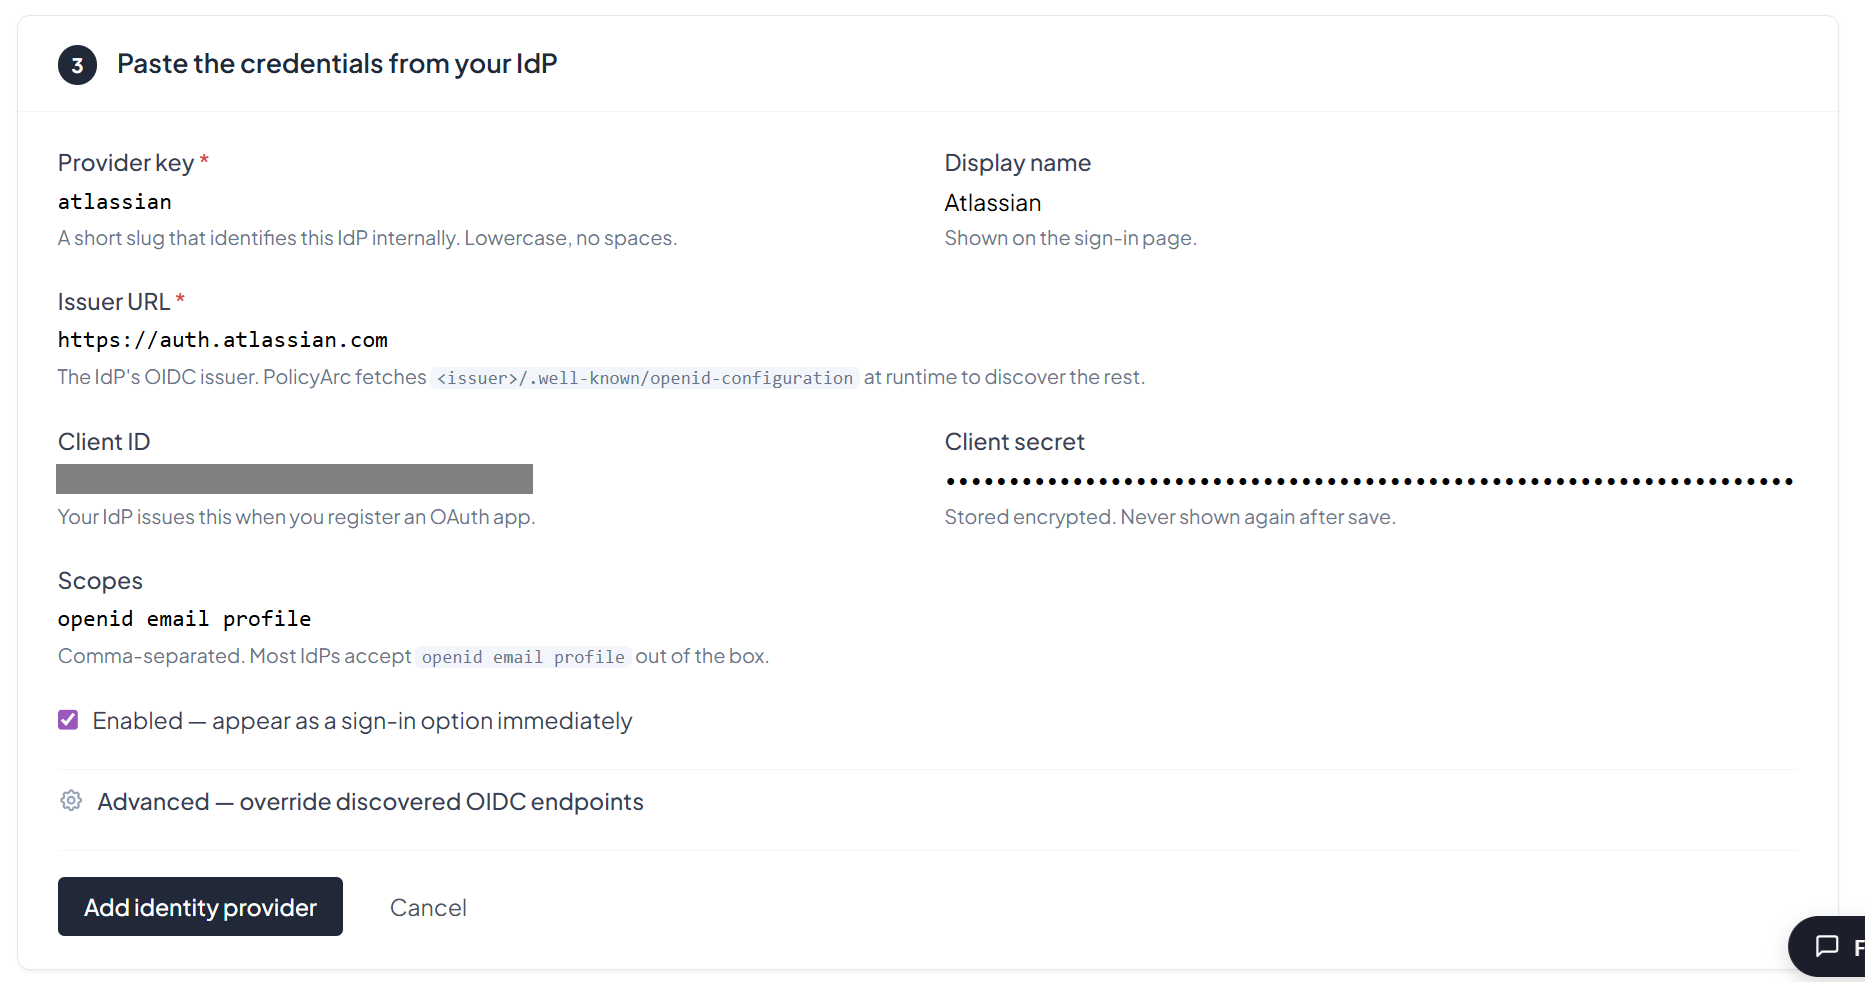
Click Add identity provider. You'll land back on the environment overview with the Atlassian IDP connected and ready to use.
Enabling and disabling an IDP
To temporarily disable the Atlassian IDP without deleting it, open it from the Identity list and toggle Enabled off. Disabled IDPs are hidden from sign-in but their configuration is preserved.
What's next
The Atlassian IDP is now authenticating users. Next, give them an Atlassian resource to access:
- Recommended: Jira (user passthrough) — forwards each user's own Atlassian OAuth token, so calls act as the signed-in user (not a service account).
- Confluence — pages, spaces, and comments via the same Atlassian pass-through (add the granular scopes in Step 7 first).
- All resource connectors →